Requirements[ | ]
You will need to have the Squad SDK installed and open. Please read the instructions on that page carefully for installation and frequently asked questions before beginning this guide.
Create Mod Wizard[ | ]
The Modding Hub wizard automates the process for creating a Squad mod. It:
- Creates a new mod folder for your mod under
Squad\Squad\Plugins\Mods\ - Creates a mod configuration file at
Squad\Squad\Plugins\Mods\<mod_name>\modinfo.smi - Creates a content folder for your mod at
Squad\Squad\Plugins\Mods\<mod_name>\Content\
Guide[ | ]
To begin, left click on the Modding Hub button at the top right of the Squad SDK.

Create Squad Mod[ | ]
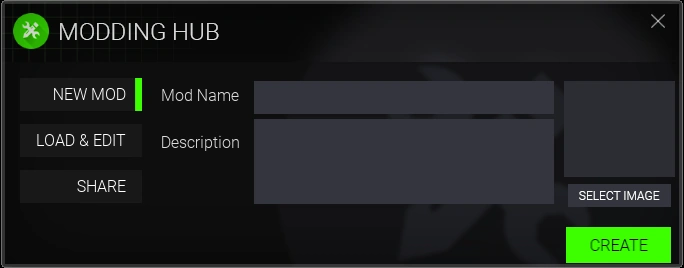
- Mod Name
- This is the name of your mod. The name cannot have spaces, special characters or symbols.
- Mod Description
- This is the main description of your mod. It will appear on the Steam Workshop page for your mod.
- Steam Image Preview
- This is the thumbnail image that will appear on the workshop for your mod. It's minimum size is 198x by 198x.
Upon successfully creation of your mod project, a notification will appear at the bottom right of the Squad SDK with the message "<mod_name> was created successfully!".
Note[ | ]
If you plan on changing your mod description in the workshop after you release it, upon updating your mod to a newer version later on. Any information that you put in 'Mod Description' when you created your mod will override your workshop description and name. Be sure to keep your workshop description in a note pad so that you can change it later on.
Select Content Folder[ | ]
Now that you have created your mod project, you will need to open your mod's content folder within Unreal Engine's Content Browser.
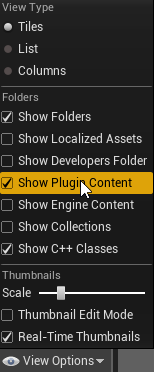
- Begin by left clicking on the "View Options" button at the bottom right of the Content Browser, then making sure that "Show Plugin Content" has a check marked next to it.
- Next, left click on the button with three horizontal lines running through it at the top left of the content browser, next to "Filters"
 .
. - Scroll down on that list until you find the folder labelled "<mod_name> Content". Double left click on it to select it.
This folder is the content folder for your mod. ALL OF YOUR ASSETS FOR YOUR MOD MUST BE STORED HERE.
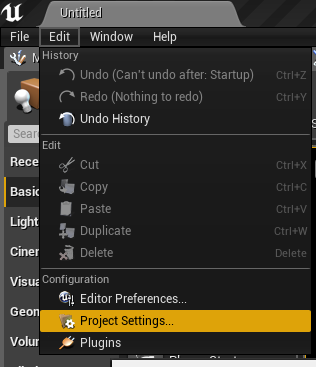
Updating Project Settings[ | ]
With the introduction of the 2.0 Layer Overhaul the Asset Manager helps the Layer Overhaul get the list of Levels, Layers, Faction, and Faction Setups.
You can access the Asset Manager in the Project Settings.
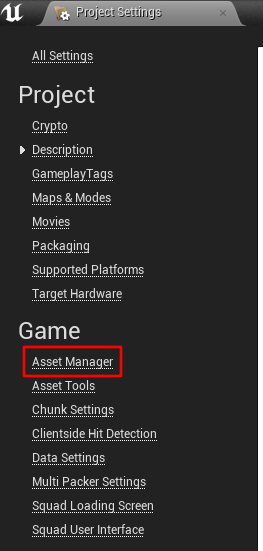
Within this asset manager you must add your mod's path.
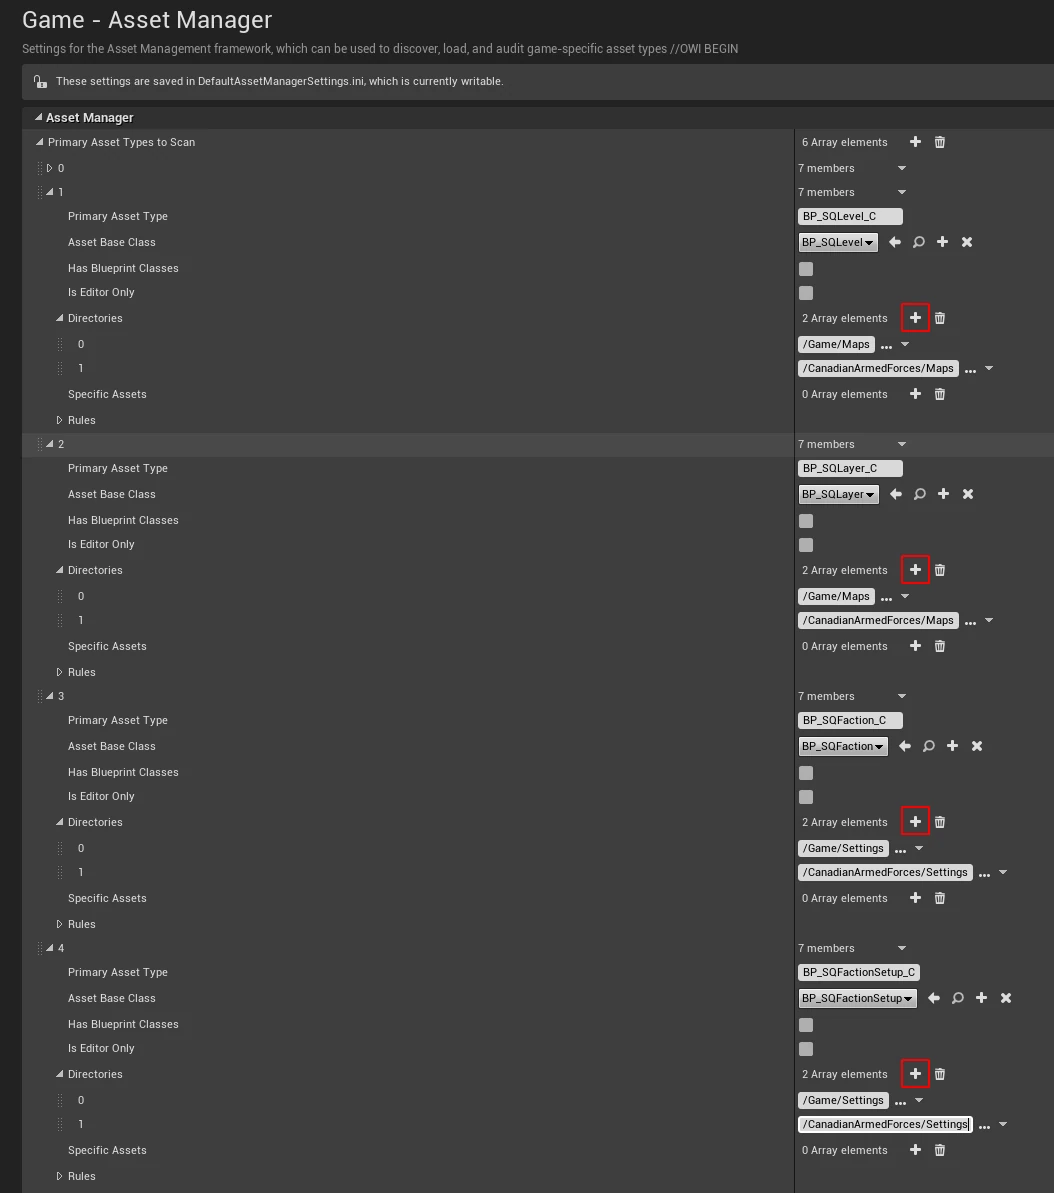
You can add directories by clicking the plus icon highlighted in red for each asset type. In the example above the CAF directories have been added. It is recommended that you follow the vanilla games folder setup. If you decide not to follow the same folder hierarchy then you must point the corresponding directory to the correct folder.
Congratulations! You have completed the necessary steps to begin your modding career. Please select the type of mod you wish to create to continue on this guide:
- Custom Map
- Custom Map Layer
- Custom Deployable
Once you have created your mod, you may want to consider releasing it to the community.